If you’ve used Git before, you should be familiar with using git add, git restore, and git restore --staged. These are commands that coders use all the time to stage, restore, and unstage file changes. However, what if you don’t want to add, restore, or unstage a whole file, but only parts of it? That’s where the -p option and --patch flag come into play.
Table of contents
How to Use Patches When Adding/Restoring/Unstaging
To use patches when staging, restoring, or unstaging files, all one needs to do is add -p or --patch to the command. For example, when staging parts of a file, one may type something similar to the following:
$ git add -p file1.txt
or for restoring/unstaging parts of a file:
# Restoring parts of a file that hasn't been staged
$ git restore -p file2.txt

# Unstaging parts of a file that has been staged
$ git restore --staged -p file3.txt
After typing one of those commands, Git will attempt to split up the code changes in the file into what they call “hunks”. It’ll then go through each hunk, prompting you to tell Git what you would like to do with the hunk.
Staging Parts of a File Example
Let’s go through a concrete example. I’ll be showing how to stage parts of a Python file related to creating singleton classes. The following shows me running a git diff on the file:
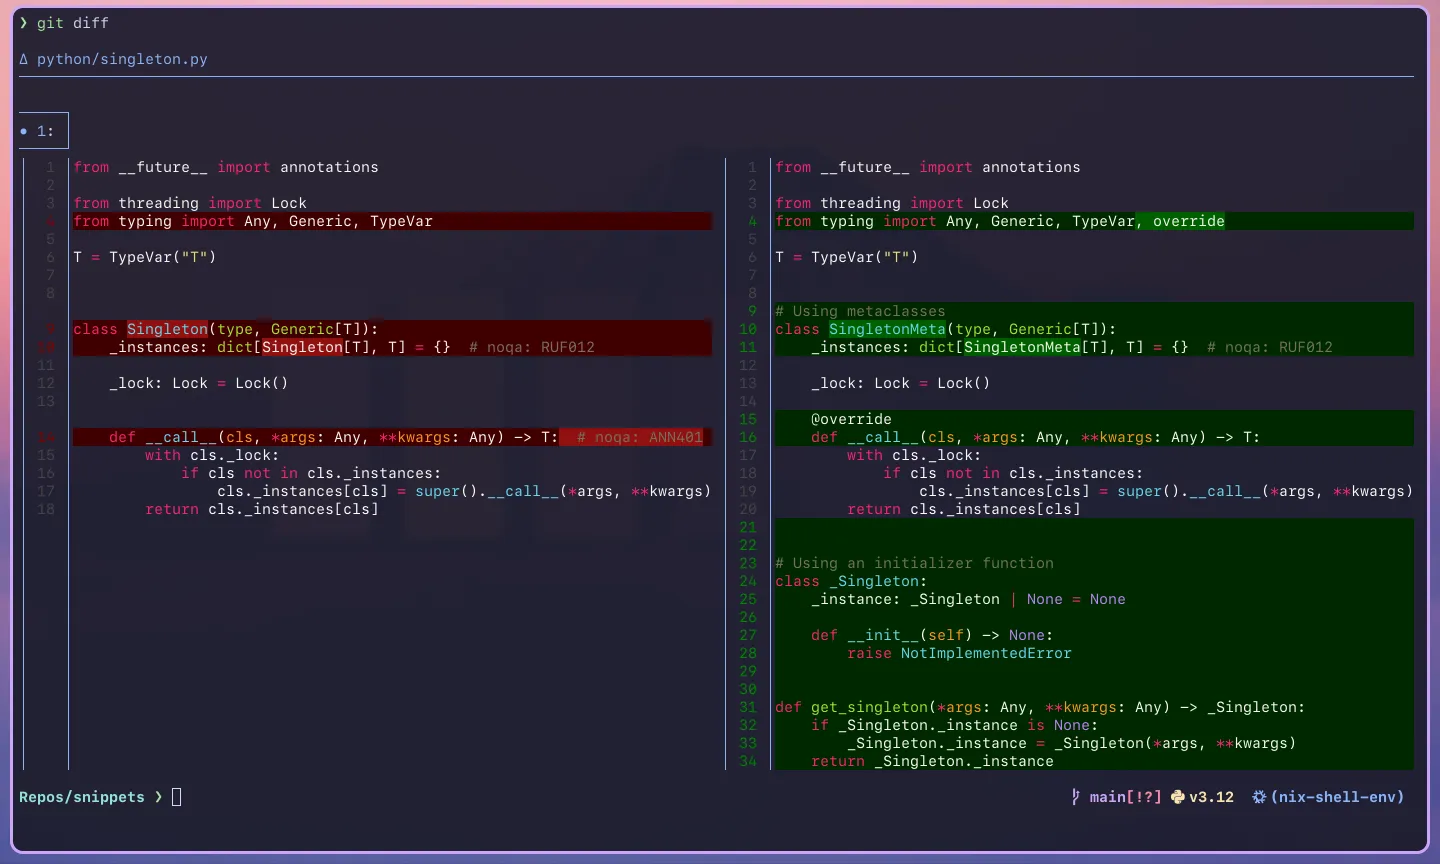
TIP
I’m using delta to make the output of git diff prettier and more interpretable. I highly recommend it!
Typically, you would want a single Git commit to encapsulate the changes related to a single “thing”. In this case, our git diff shows changes related to three different “things”:
- The first is adding an
overridedecorator toSingleton/SingletonMeta’s__call__function, - the second is renaming
SingletontoSingletonMeta, - and the last one is adding a new approach of creating singletions using an initializer function.
NOTE
If we were to run the usual git add + git commit combo, we’d have one commit being responsible for three different changes to the code which ain’t good practice!
Instead, we can use patches to only add certain parts of the file to staging. Let’s show you how it’s done by only adding the sections of code related to the override change. As I mentioned before, we can run git add -p python/singleton.py to start selecting which hunks we want to stage in the commit. Running this gives us the following:
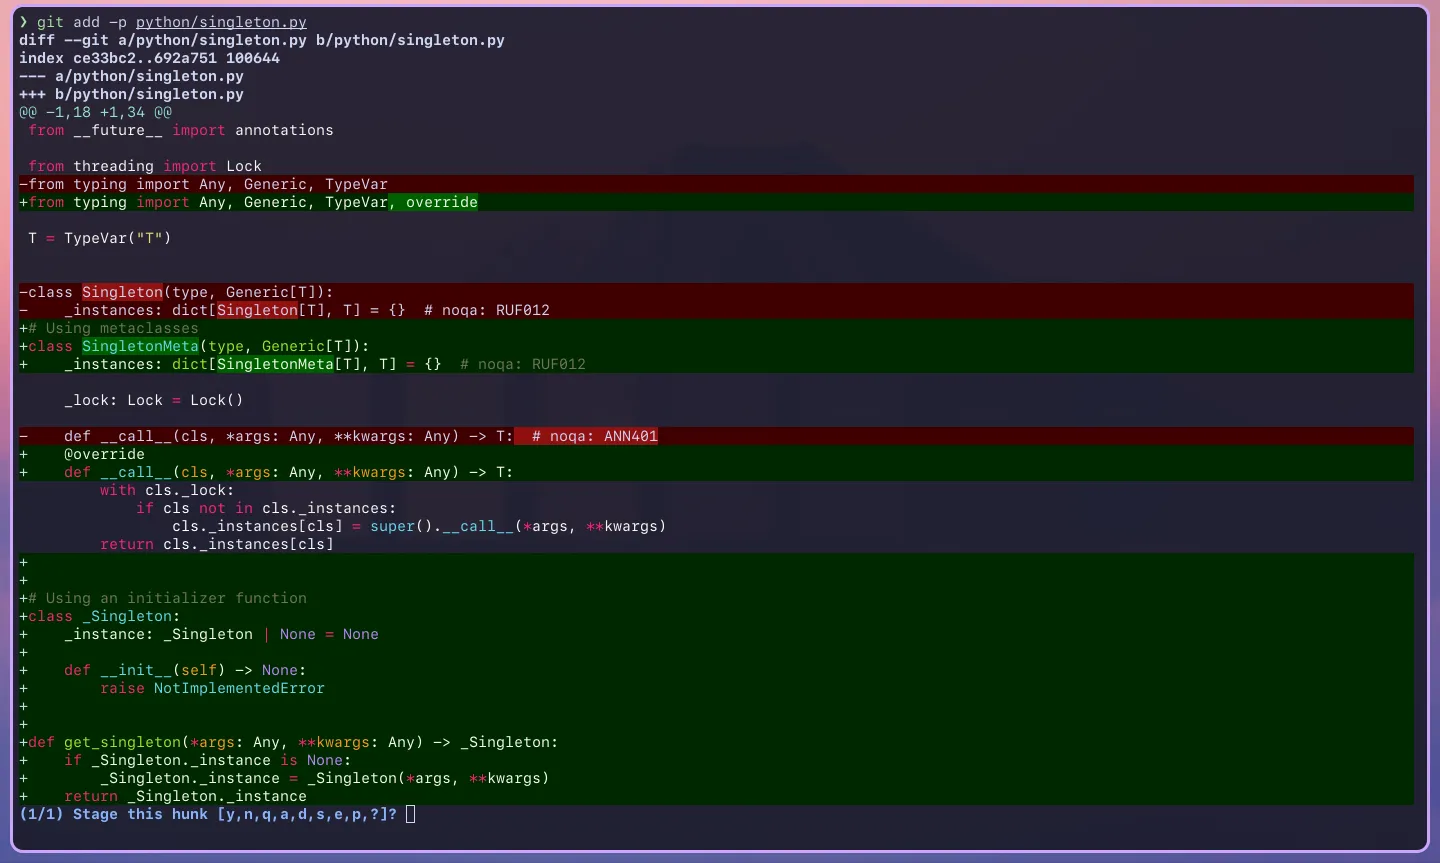
Git has guessed that the changes we’ve made to the code are all one hunk and is asking if we want to stage this hunk. That is the same staging all the changes and is not what we want. At the bottom of the screen, Git has given us some options of what we can do with this hunk:
(1/1) Stage this hunk [y,n,q,a,d,s,e,p,?]
If you don’t know what to do, entering ? into the prompt will bring up the help menu, explaining what each option does to the hunk (or rest of the hunk):

We want to split the hunk into smaller hunks so that we can choose what parts of the file to stage, so s seems like the right option to choose.

Git tells us that the one hunk has been split into four smaller hunks and shows us the first of the four hunks (notice the 1/4 at the bottom). This first hunk only contains the new importation of typing.override which is related to the commit we are aiming towards. Let’s stage this hunk by entering y.
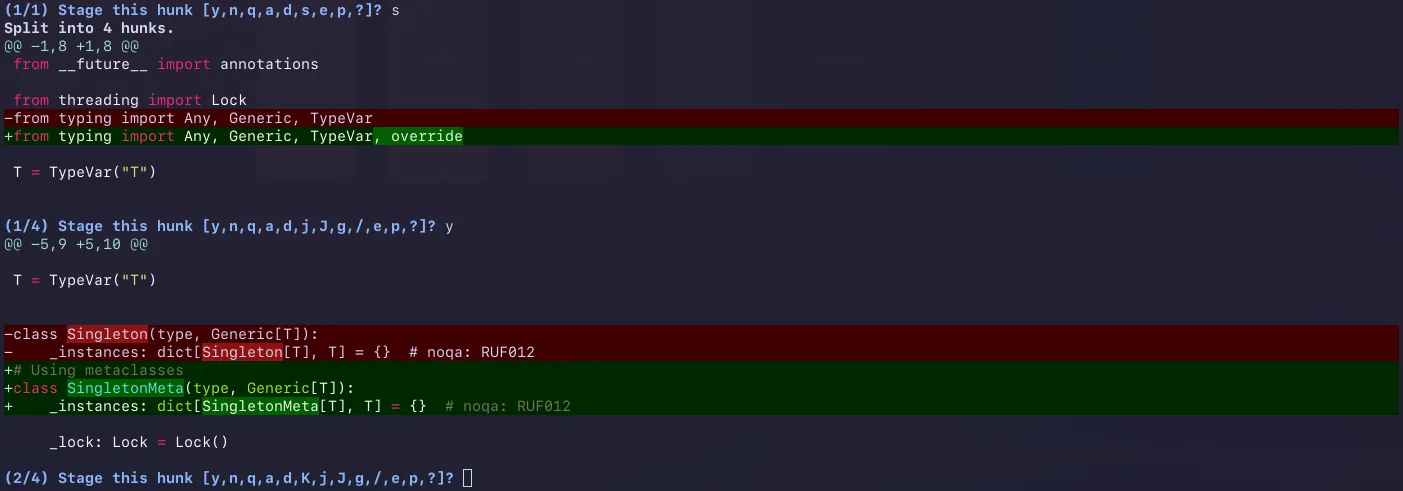
We have now staged the first hunk and Git has moved onto the second hunk (notice the 1/4 at the bottom has changed to 2/4). The second hunk seems to be related to renaming the Singleton class so let’s ignore this hunk by entering n into the prompt.

The third hunk shows us adding the @override decorator to the __call__ function which should be staged. Again, let’s do that by entering y.
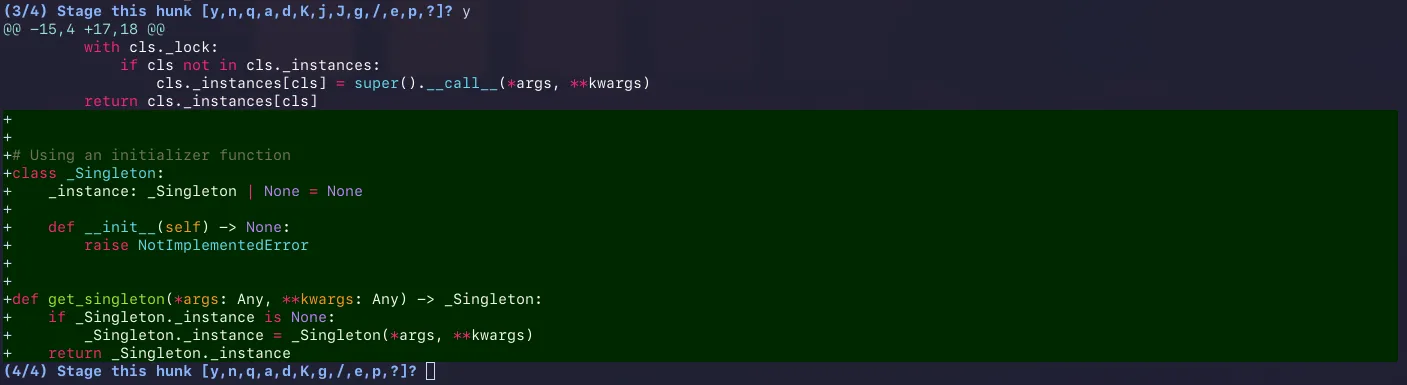
We now move onto our last hunk which is not related to the commit we’re trying to make. Let’s ignore this one by typing n. We’re now done with all the hunks!
Let’s check out what’s staged by running git diff --cached:
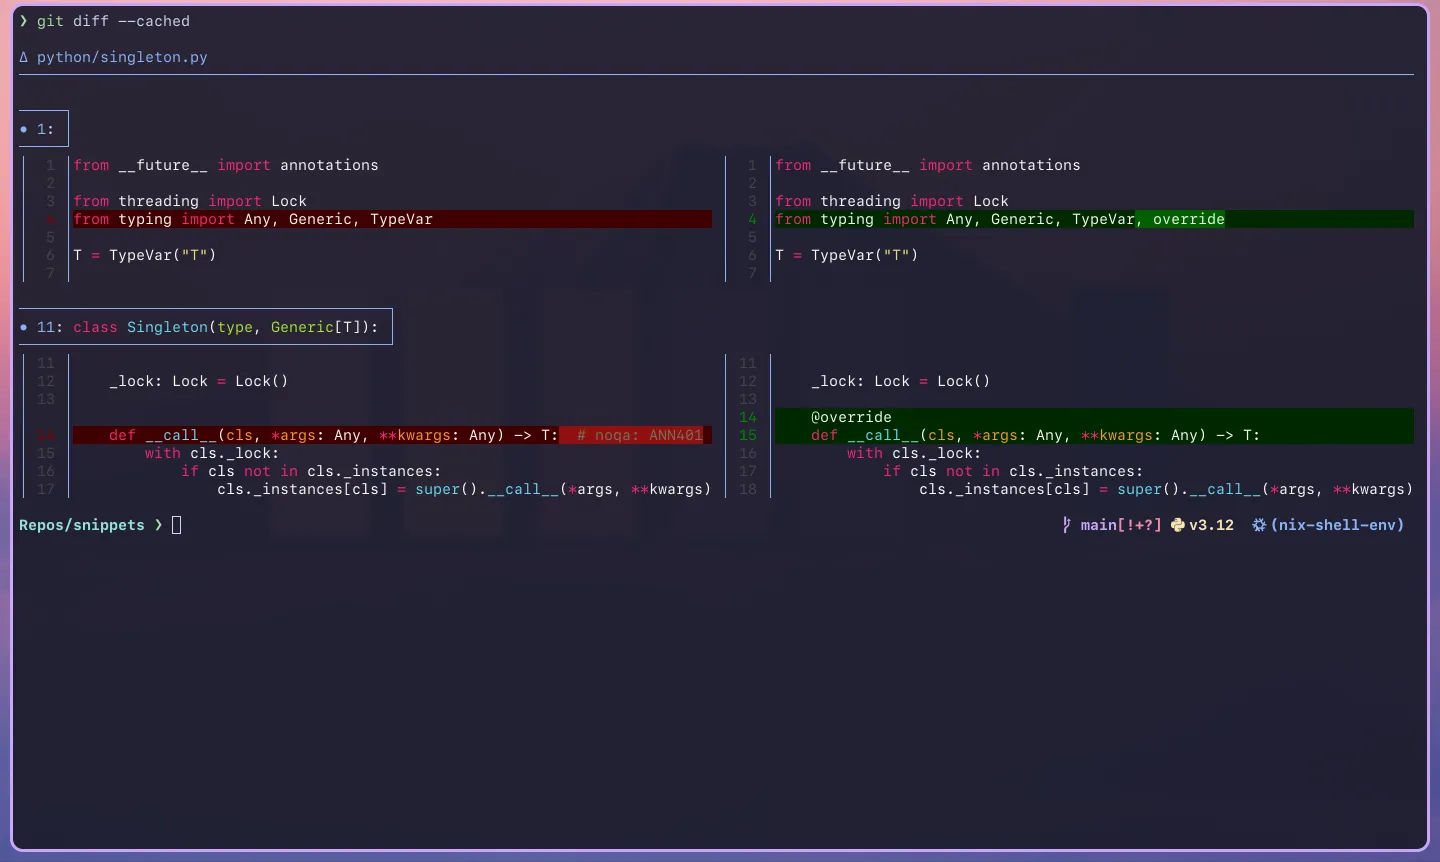
You’ll notice that the only parts that are staged for the commit are related to adding th override decorator. We can also make such that we haven’t lost the other changes we’ve made by running git diff:

Our other changes are still there! We can now run git commit without worrying about the commit capturing the other changes to the file that are not related to adding the override decorator.
We can then repeat the process for either of the other two changes we’ve made to the code.
NOTE
I’ve only shown the use of patches when running git add -p, but the process is the same for git restore -p and git restore --staged -p. Give the other two a go when you have the chance.
Time to Wrap Up
Today, you have hopefully learnt how you can use patches when staging, restoring, and unstaging parts of files. With this new skill, you should be able to speed up your workflow and make using Git a bit easier.
I’ve only shown what the y, n, and s options do in the example, but I highly recommend you to explore what the other options do. The e option is particularly useful when Git does not or is unable to split a hunk.
Anyways, thanks for reading and I hope to see you in my next post!